If you're looking for a way to boost your profits, vehicle graphics are a great option. They're...
When it comes to wrapping a vehicle, there's a lot to consider. The design, color, and finish choices, as well as the installation, are just a few of the obvious things. But achieving an efficient wrap installation begins with choosing the right auto vinyl.
In this blog post, we will explore seven main factors you should consider when choosing auto vinyl for your next vehicle wrap. We will also provide some tips and tricks to help you make the best decision for your needs.
Whether you are a DIYer or a professional installer, this blog post will provide you with the information you need to choose the right auto vinyl for your next vehicle wrap.
1. Material
The variety of vehicular vinyl wraps is immense, and the quality of vinyl can vary greatly from manufacturer to manufacturer. This is why it's important to invest time and effort into researching which wrapping vinyl is the best fit for your needs.
Here are some of the factors you should consider when researching vehicular vinyl wraps:
- The type of vehicle you are wrapping. Different types of vehicles require different types of vinyl. For example, a car will require a different type of vinyl than a truck or an SUV.
- The climate you live in. If you live in a hot climate, you will need to choose a vinyl that is resistant to heat and fading. If you live in a cold climate, you will need to choose a vinyl that is resistant to cold and cracking.
- The lifespan you need. How long do you want the wrap to last? Some vinyl can last for up to 10 years, while other types of vinyl may only last a few years.
- Your budget. Vehicular vinyl wraps can range in price from a few hundred dollars to a few thousand dollars. It's important to set a budget before you start shopping so that you do not overspend.
- Your level of experience. Some vehicular vinyl wraps are easier to install than others. If you are a DIYer, you may want to choose a vinyl that is easier to install.
- The look you are going for. There are many different colors and finishes of vehicular vinyl wraps available. Choose the one that best matches your desired look.
By considering these factors, you can choose the vehicular vinyl wrap that is the best fit for your needs.
2. Creating Templates
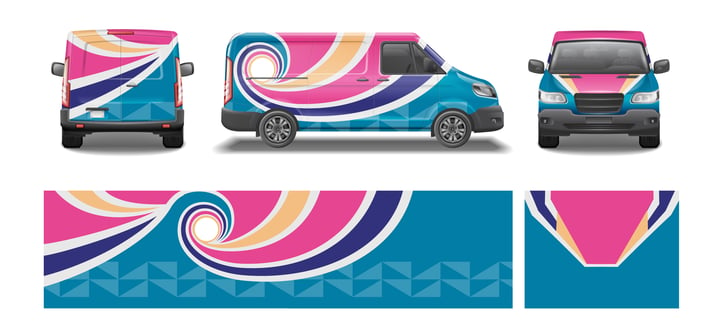
The best way to create and visualize a vehicle wrap design is to create templates from the vehicle itself. To do this, you will need to take straight-on photos of the vehicle from the front, side, and back.
Using the actual vehicle to create templates allows you to layout the design in a way that simplifies the transitions between panels and minimizes installation difficulties.
Creating templates using the vehicle also allows customers to see what the design will look like on their vehicle, which can help to identify any potential problems or make last-minute changes to ensure that the design meets their expectations.
Here are the steps on how to create templates for a vehicle wrap:
- Take straight-on photos of the vehicle from the front, side, and back.
- Use photo editing software to crop the photos to remove any unwanted background.
- Trace the outline of the vehicle on each photo.
- Save the traced outlines as separate files.
- Use the traced outlines to create a template for each panel of the vehicle wrap.
- Test fit the templates on the vehicle to ensure that they fit properly.
- Make any necessary adjustments to the templates.
- Once the templates are finalized, you can use them to create the vehicle wrap design.
By following these steps, you can create templates that will help you to create a vehicle wrap design that is both visually appealing and easy to install.
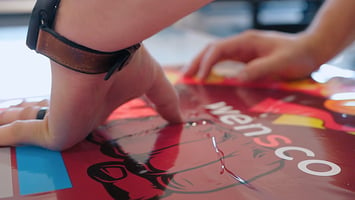
3. Production
We spend time researching the right automotive vinyl because, during the production phase, we need to make sure we use the correct printing profile for that specific vinyl and printer.
Wide-format printers are different from traditional home or office printers. They have special settings that are specific to the type of material being used and the quality of print that needs to be achieved.
Because of these specific needs, it is important to ensure that the printer you are using and the automotive vinyl you have selected are compatible.
If you use the wrong printing profile, the results could be suboptimal. The colors might not be accurate, the print might not be as sharp, or the vinyl might not adhere properly to the vehicle.
To avoid these problems, it is important to do your research and select the right automotive vinyl and printer for your needs.
4. Preparation
.jpg?width=720&height=480&name=car-wash-detailing-station%20(1).jpg)
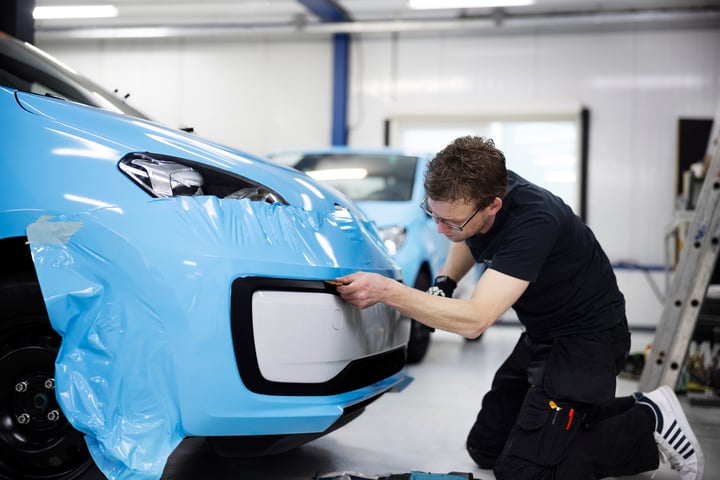
The surface preparation step is arguably one of the most important steps in the vehicle wrap process, outside of actually installing the wrap. This is because a clean surface is essential for the vinyl to adhere properly and last as long as possible.
To clean the surface, you will need to use a special solution that will remove all wax, dirt, dust, and debris. You can find these solutions at most automotive supply stores.
Once the surface is clean, you will need to dry it thoroughly with a clean towel. It is important to take your time with this step and make sure that the surface is completely clean and dry.
If there is any dirt or debris left on the surface, it could cause the vinyl to fail prematurely.
By taking the time to properly prepare the surface, you can ensure that your vehicle wrap will look great and last for years to come.
Here are some additional tips for surface preparation:
-
Use a mild soap and water solution to clean the surface. Do not use harsh chemicals or abrasive cleaners, as these can damage the surface and make it more difficult for the vinyl to adhere.
-
Scrub the surface thoroughly with a soap and water solution. Be sure to get into all the nooks and crannies.
-
Rinse the surface thoroughly with clean water. Be sure to remove all of the soap residue.
-
Dry the surface thoroughly with a clean towel. Be sure to dry the surface completely, as any moisture left behind can cause the vinyl to fail.
-
Inspect the surface for any remaining dirt or debris. If you find any, repeat the cleaning process until the surface is completely clean.
By following these tips, you can ensure that your vehicle wrap surface is properly prepared for installation.
5. Installation Facility
It would be a shame to go through all of the steps involved in vehicle wrapping only to choose a poor installation spot. Environmental factors can play a real role in how well the vinyl adheres to the vehicle.
In addition to wanting to eliminate wind and dust, you also need to make sure that the temperature is ideal for the type of vinyl you are using. Too cold or too hot of an environment can prevent the vinyl from adhering properly.
While vinyl technology has come a long way, there are still some limitations to what it can withstand.
The best spot to install an automotive wrap is in a clean, indoor location where the temperature can be controlled.
This will eliminate a majority of factors that can affect the installation and ensure that your vehicle wrap looks its best for years to come.
Here are some additional tips for choosing an installation spot:
-
Choose a spot that is well-lit. This will make it easier to see what you are doing and to avoid making mistakes.
-
Choose a spot that is free of dust and debris. This will help to ensure that the vinyl adheres properly.
-
Choose a spot that is not too cold or too hot. The ideal temperature range for installing vinyl is between 60 and 80 degrees Fahrenheit.
-
Choose a spot that is not exposed to direct sunlight. This will help to prevent the vinyl from fading.
-
Choose a spot that is not exposed to excessive rain or moisture. This will help to prevent the vinyl from peeling.
-
Choose a spot that is not exposed to excessive chemicals or pollutants. These can damage the vinyl and shorten its lifespan.
By following these tips, you can choose an installation spot that will give you the best possible results for your vehicle wrap.
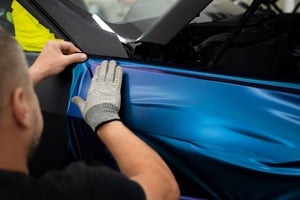
6. Installation
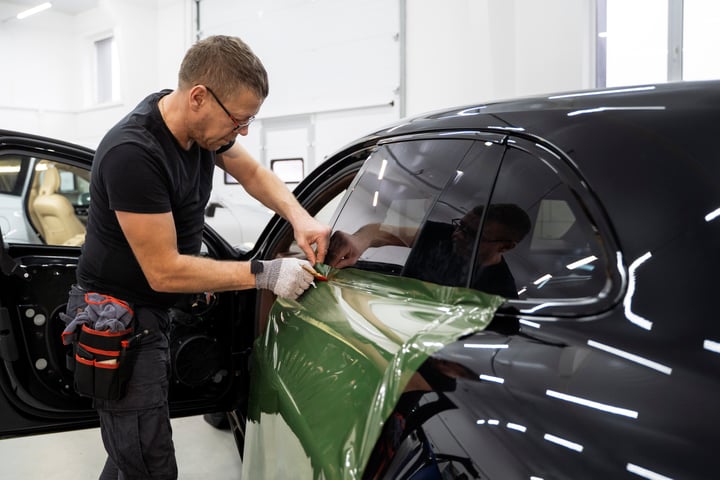
You're finally ready to install the vinyl wrap! By now, you've already put in a lot of time and effort, so let's make sure we finish strong. Hopefully, you've selected a vinyl material that will make this process easier, not harder.
Here are some things to keep in mind when installing a vinyl wrap:
-
Take your time and be patient. Installing a vinyl wrap can be a tedious process, so it's important to take your time and be patient. Rushing can lead to mistakes, which can ruin the look of the wrap.
-
Use the right tools. There are a few specific tools that you'll need to install a vinyl wrap, such as a heat gun, a squeegee, and a cutting mat. Make sure you have these tools before you start the installation process.
-
Follow the instructions carefully. Most vinyl wrap kits come with instructions that will walk you through the installation process step-by-step. Make sure you read and follow these instructions carefully.
-
Be prepared to make adjustments. Even if you follow the instructions carefully, there may be some areas where you need to make adjustments to the wrap. This is perfectly normal, so don't be afraid to make changes as needed.
-
Use a heat gun to remove any wrinkles. Once the vinyl wrap is in place, you may need to use a heat gun to remove any wrinkles. Be careful not to overheat the vinyl, as this can damage it.
By following these tips, you can install a vinyl wrap like a pro!
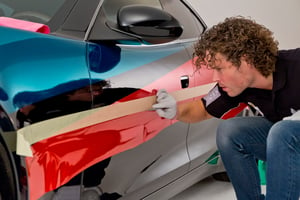
7. Post Installation
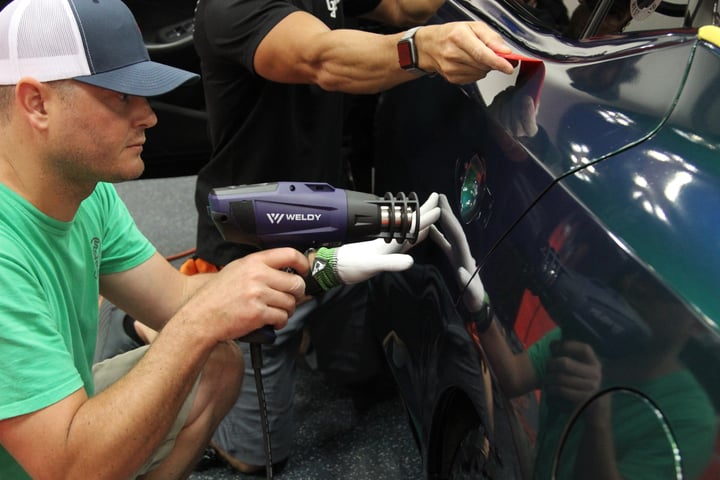
After installation run along any rounded edges with a heat gun. The recommended temperature will be based on what type of vinyl you used, doing this will help remove any stretches or stress in these areas and will stop the wrap from pulling away.
Left as is, the automotive vinyl could try to return to its “normal” shape, which would allow openings for water and other contaminants to ruin your automotive wrap.
Here are some tips for using a heat gun to remove stretches or stress from rounded edges:
-
Start with a low heat setting and gradually increase the heat as needed.
-
Hold the heat gun about 6 inches away from the vinyl.
-
Move the heat gun in a circular motion.
-
Be careful not to overheat the vinyl, as this could damage it.
-
Once the vinyl is warm, use your fingers to smooth out any wrinkles or bubbles.
-
Repeat the process on all of the rounded edges of the wrap.
By following these tips, you can ensure that your automotive wrap will look great and last for years to come.
Resources
There are a number of resources available to help you learn about vehicle graphics. One resource is the Wrap Institute YouTube Channel. The Wrap Institute offers a variety of video tutorials on vehicle graphics. Another is our Wensco Wrap Classes. The Wensco Wrap Classes are a 2-Day hands-on car wrapping experience with our certified Wrap Specialists. Included is a Wrap Tool Kit and free lunch. You can join our waitlist here.
Check out our selection of Vinyl, Paint Protection Films, Window Tint Films, and Accessories, and start your Wrap Journey today!